Welcome to the dynamic realm of computer performance and troubleshooting. In the ever-evolving landscape of technology, few components hold as much sway as Random Access Memory (RAM) when it comes to enhancing your system’s capabilities. However, even the most exciting upgrades can come with unexpected challenges. One such challenge is the perplexing occurrence of encountering no display after a RAM installation. This article serves as your guiding light, offering a concise and systematic troubleshooting approach to tackle this issue head-on. Whether you’re a curious newcomer or a tech-savvy explorer, our guide empowers you with the knowledge and methods to uncover the root causes and reignite your display with newfound clarity. Let’s embark on this illuminating journey of RAM troubleshooting.
Understanding the Basics
In this section, we’ll lay the groundwork for unravelling the complexities of RAM and its role in your system. From the installation process to crucial compatibility factors and precautions, these basics are the building blocks of a successful troubleshooting journey.
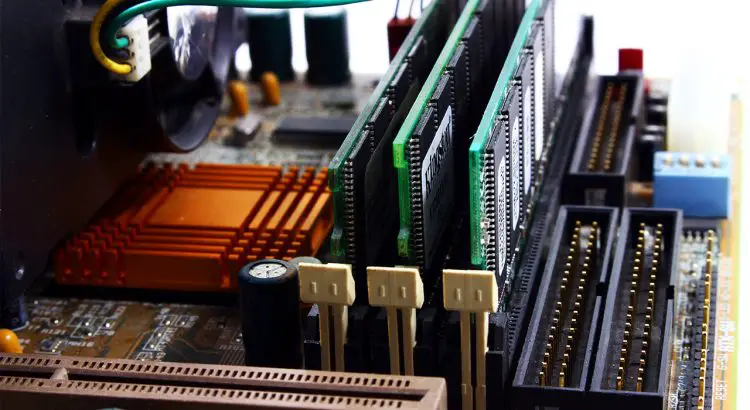
A. RAM Installation Process Overview
Mastering the art of RAM installation is vital for seamless system upgrades. We’ll provide a concise overview of the installation steps, ensuring you’re well-prepared to safely and effectively integrate new RAM modules into your system.
B. Factors Affecting Compatibility and Performance
Unlock the mysteries behind RAM compatibility and performance. We’ll demystify clock speeds, module types, and capacity considerations, enabling you to make informed choices when selecting and upgrading your RAM.
C. Precautions Before Installing New RAM
Taking the necessary precautions before you embark on a RAM installation adventure. We’ll highlight essential steps to safeguard your hardware and data, ensuring a smooth and risk-free installation process.
These foundational insights will pave the way for a deeper exploration into troubleshooting RAM-related display issues. Let’s build a solid understanding before we delve into the intricacies of the challenge.
Troubleshooting Steps
Embark on a systematic journey to diagnose and resolve the “no display” issue that’s been casting a shadow over your system. Our step-by-step approach ensures you cover all bases, starting with the basics.
A. Step 1: Basic Checks
When the screen remains blank after a RAM upgrade, it’s time to start with the basics. These initial checks set the stage for further troubleshooting.
Ensure the Computer is Powered Off and Unplugged: Safety first. Ensure your computer is completely powered off and disconnected from the power source before proceeding.
Re-seat the RAM Modules: Gently remove the RAM modules and re-insert them into their respective slots. Ensure a snug fit, as loose connections can disrupt proper functioning.
Check for Any Loose Connections: Examine all internal and external connections, including monitor cables, power cords, and peripheral connections. Secure any loose connections to eliminate potential sources of the issue.
With these foundational steps, you’ll address common culprits causing the “no display” situation. Move forward confidently as we unravel the intricacies of troubleshooting RAM-related display problems.
B. Step 2: Verify Compatibility
As we delve deeper into troubleshooting, ensuring that your newly installed RAM is compatible with your system is essential. Let’s undertake a thorough compatibility check.
Check Motherboard Specifications: Your motherboard is the foundation for your system’s components. Refer to your motherboard’s manual or manufacturer’s website to confirm that your installed RAM is supported and compatible. Not all RAM modules play well with every motherboard.
Confirm RAM Module Type, Speed, and Capacity: Compare the specifications of your new RAM modules with what your motherboard can handle. Ensure that the RAM type (DDR3, DDR4, etc.), speed, and capacity align with your motherboard’s capabilities. Mismatched specifications can lead to compatibility issues.
Ensure All RAM Slots are Properly Populated: If your motherboard has multiple RAM slots, ensure the new RAM modules are inserted into the correct slots according to your motherboard’s guidelines. Improperly populating RAM slots can hinder performance and potentially lead to display issues.
By meticulously confirming compatibility, you’re taking a significant step toward identifying any underlying compatibility-related factors contributing to the no-display problem. Your grasp of these essentials will prove invaluable as we progress through the troubleshooting process.
C. Step 3: Inspect RAM Modules
Now, let’s focus on the physical aspects of your RAM modules – a critical step in our troubleshooting process.
Clean the RAM Modules and Slots if Necessary: Over time, dust and debris can accumulate on your RAM modules and within the slots themselves. Gently clean the RAM modules using a soft, lint-free cloth, and use compressed air to remove any particles from the slots. This ensures proper contact and connectivity.
Check for Physical Damage on RAM Modules: Inspect your RAM modules for any visible signs of damage, such as bent pins, cracks, or chips. Even minor damage can disrupt the data flow and lead to display issues. If you identify any problems, replacing the damaged modules is best.
By conducting a visual and physical inspection of your RAM modules, you’re taking proactive measures to rule out potential hardware-related causes for the “no display” situation. As we move forward, you’ll be equipped with a clearer understanding of the physical health of your components.
D. Step 4: Test Individual RAM Modules
In this step, we’ll isolate potential issues by testing each RAM module individually.
Install One RAM Module at a Time: Remove only one RAM module from your system. This helps narrow down whether a particular module is causing the issue. Insert it into the appropriate slot according to your motherboard’s guidelines.
Boot the System to Check for Display: Power on your computer and observe if the display is functioning correctly with the single RAM module. If the display works, proceed to the next step. If not, repeat the process with a different RAM module.
Identify Faulty RAM Module(s), if Any: If your system displays appropriately with one of the RAM modules but not others, it’s likely that one is faulty. Replace the problematic module(s) with known-good RAM, or consider purchasing a replacement.
By methodically testing each RAM module, you can pinpoint if any individual module is causing the display issue. This targeted approach brings you closer to a resolution by identifying and addressing potential hardware problems.
E. Step 5: Check BIOS Settings
Let’s delve into your system’s BIOS settings to ensure they align with your new RAM configuration.
Reset BIOS Settings to Default: Access your computer’s BIOS settings (usually by pressing a specific key during startup, like F2 or Delete). Locate the option to reset the BIOS settings to their default values. This helps eliminate any misconfigurations that might be affecting your RAM.
Verify RAM Settings (Frequency, Voltage, Timings): After resetting to default, check that the BIOS recognizes your RAM modules correctly. Verify that the RAM frequency, voltage, and timings match the specifications of your new RAM modules. Incorrect settings can lead to stability issues and display problems.
Update BIOS if Necessary: Outdated BIOS versions might not correctly support newer RAM modules. Check your motherboard manufacturer’s website for BIOS updates that address RAM compatibility. Follow the manufacturer’s instructions carefully to update your BIOS.
By scrutinizing your BIOS settings, you ensure your system is optimized to work seamlessly with your new RAM. A harmonious BIOS configuration can often resolve compatibility-related display issues, allowing you to maximize your upgraded hardware.
F. Step 6: Power Supply and Cabling
In this step, we’ll focus on your system’s crucial power supply and cabling aspects.
Ensure Proper Power Connections: Double-check that all power cables are securely connected to your components, including the motherboard, graphics card, and storage devices. A loose power connection can lead to insufficient power distribution and display issues.
Check for Any Damaged Cables or Connectors: Inspect all cables and connectors for any signs of damage, wear, or fraying. Damaged cables can disrupt the flow of power and data, causing intermittent or no display output. Replace any compromised cables to ensure optimal connectivity.
By meticulously reviewing your power supply and cabling setup, you’re tackling potential sources of instability head-on. Ensuring consistent and reliable power delivery is paramount for a smooth computing experience and can play a pivotal role in resolving display-related challenges.
G. Step 7: Graphics Card and Other Components
Now, let’s focus on your graphics card and other essential components.
Re-seat the Graphics Card: Remove and re-insert your graphics card, ensuring it’s properly seated in its slot. A loose or improperly seated graphics card can lead to display issues.
Inspect Other Hardware Components for Issues: Conduct a visual inspection of other critical components, such as the CPU, power connectors, and cooling solutions. Look for any signs of damage or irregularities that could impact your system’s performance.
Addressing potential concerns with your graphics card and other components can illuminate any underlying causes of the display issue.
H. Step 8: Test with Minimal Hardware
In this step, we’ll streamline your system to the essentials for troubleshooting purposes.
Disconnect Unnecessary Peripherals: Temporarily disconnect all non-essential peripherals, such as printers, external drives, and additional monitors. This reduces potential points of failure during troubleshooting.
Boot with Essential Components Only: Start your system with only the essential components connected – the motherboard, CPU, one RAM module, and the graphics card. You can determine if any peripherals or components were causing the display problem by eliminating variables.
This streamlined approach helps you isolate potential hardware or peripheral-related issues, bringing you closer to identifying the root cause of the “no display” situation.
Step 9: Test with Known Good RAM
In this step, we’ll conduct a controlled test using RAM known as functional.
Borrow or Use RAM That Is Known to Work: If available, obtain a set of RAM modules you know are functioning correctly in another system. This helps us determine if the issue lies specifically with your new RAM or other components.
Check if the Display Issue Persists: Replace your new RAM with the known good RAM modules and power on your system. Monitor the display to see if the issue persists. If the display works without any problems, it suggests that the original RAM modules might be faulty.
Testing with known good RAM lets you differentiate between RAM-related issues and other potential factors impacting your display. By systematically eliminating variables, we’re inching closer to a solution.
Step 10: Seek Professional Help
It’s time to consider professional assistance for complex issues when all else fails.
Consult a Professional Technician or Service Center: If you’ve diligently followed the previous steps and the “no display” problem persists, it might be time to seek help from an experienced technician. They have the expertise and tools to diagnose and address more intricate hardware-related challenges.
Diagnose and Address Complex Hardware Problems: Professional technicians know how to diagnose and resolve complex hardware issues that might be beyond the scope of basic troubleshooting. They can conduct in-depth tests, identify component failures, and provide solutions tailored to your system.
Remember, seeking professional help doesn’t indicate defeat; rather, it’s a proactive step toward resolving the issue effectively and efficiently. Your system’s health and functionality are paramount, and sometimes, the expertise of a professional can be the key to a successful resolution.
Conclusion
In the intricate tapestry of computing, the role of RAM is unparalleled in shaping performance and responsiveness. This troubleshooting guide has been your compass through the labyrinth of “no display” challenges after a RAM upgrade. As we wrap up this journey, let’s distil the essence of our exploration.
A. Importance of Thorough Troubleshooting
Thorough troubleshooting isn’t just problem-solving; it’s a mindset that empowers you to navigate complexities and uncover solutions. By meticulously dissecting each step, you’ve showcased a commitment to mastering the art of diagnosing and resolving issues that emerge in the tech realm.
B. Recap Key Steps for Diagnosing and Resolving RAM-Related Display Issues
Recall the vital stages of our troubleshooting odyssey:
Basic Checks: Ensured solid connections and reseated RAM.
Verified Compatibility: Confirmed harmonious hardware relationships.
Inspected RAM Modules: Carefully maintained and assessed RAM health.
Tested Individual RAM Modules: Isolated potential culprits.
Checked BIOS Settings: Aligned system parameters for optimal function.
Managed Power Supply and Cabling: Nurtured stable power flow.
Addressed Graphics Card and Components: Attended to potential hardware issues.
Conducted Minimal Hardware Testing: Streamlined configuration for pinpointing.
Tested with Known Good RAM: Established comparisons for insights.
Considered Professional Help: Recognized when expertise is required.
C. Emphasize the Benefits of Proper RAM Installation and Maintenance
Remember that your journey doesn’t end here. The significance of proper RAM installation and ongoing care cannot be overstated. By adhering to compatibility, cleanliness, and conscientious hardware handling, you lay the foundation for consistent performance and resilience.
Challenges may arise in this realm of ever-evolving technology, but your newfound troubleshooting prowess equips you to face them head-on. With each obstacle surmounted, your proficiency blossoms, propelling you toward a more empowered and enriched computing experience.
As we bid farewell to this guide, embrace the confidence that arises from understanding your system intimately. May your future endeavors be as fruitful as your exploration of RAM troubleshooting. Until next time, happy computing!
V. Additional Tips and Resources
While you’ve successfully navigated the realm of troubleshooting RAM-related display issues, the journey doesn’t end here. Arm yourself with valuable tips and resources to bolster your computing prowess and be prepared for future challenges.
A. Maintenance Tips to Prevent Future Issues
Regular Dusting and Cleaning: Dust can accumulate over time, affecting cooling and overall performance. Periodically clean your computer’s interior, including RAM modules and slots, to ensure optimal airflow and heat dissipation.
Temperature Monitoring: Monitor your system’s temperatures using software utilities. Overheating can lead to instability and display problems.
Software Updates: Regularly update your operating system, drivers, and firmware. These updates often include fixes and optimizations that can enhance stability.
Static Electricity Prevention: Discharge any static electricity by touching a grounded metal surface before handling components. Static shocks can damage sensitive hardware.
B. Online Resources for Further Troubleshooting Assistance
Manufacturer’s Support Websites: Visit the websites of your motherboard, RAM, and other hardware manufacturers for troubleshooting guides, FAQs, and support forums.
Online Troubleshooting Communities: Platforms like Reddit’s r/techsupport and forums like Tom’s Hardware provide a space to seek advice from a community of tech enthusiasts.
C. Community Forums and Support Groups for Specific Hardware Brands
Motherboard and RAM Brands: Engage with fellow users on official forums or social media groups dedicated to your specific motherboard and RAM brands. These communities often offer solutions and insights into everyday issues.
Hardware Enthusiast Communities: Websites like Overclock.net and Linus Tech Tips forums provide a wealth of knowledge experienced users share.
Remember, ongoing learning and community engagement are potent tools in your tech arsenal. By staying informed, proactive, and well-connected, you’re poised to conquer any challenges that come your way. As you continue your tech journey, may these tips and resources be your trusted companions in the ever-evolving computing landscape.